Google Search Console is one of our favorite SEO tools. It’s Google’s official way of talking to you about your site and it contains so much useful, actionable information that it’s almost a crime not to use it.

Table of Contents
The more time you spend in Console, the more you’ll learn about your site, and that’s a good thing. It can be overwhelming in the beginning though. How do you know where to start? Today we’ll walk you through how to set-up Search Console, and the features we recommend for beginners. Before you know it, you’ll be using Console like a pro marketer.
Do I need Google Search Console?
Almost always the answer is going to be yes. The only exception might be if your website is on an automated web hosting platform and/or if you have a small business and simply aren’t able to put much time into your website. However, you should still spend some time on SEO in order to make sure it’s easy for your target audience to find your site. You might be interested in these eight steps for driving organic traffic.
For everyone else, we don’t know why you wouldn’t want Search Console. It’s free (always a bonus), and it gives you data and insights to help you understand how you’re ranking and appearing in search results and what you can do to change and optimize your results.
This is really useful information. We use it for our own site and for client sites every day. You definitely need to check it out.

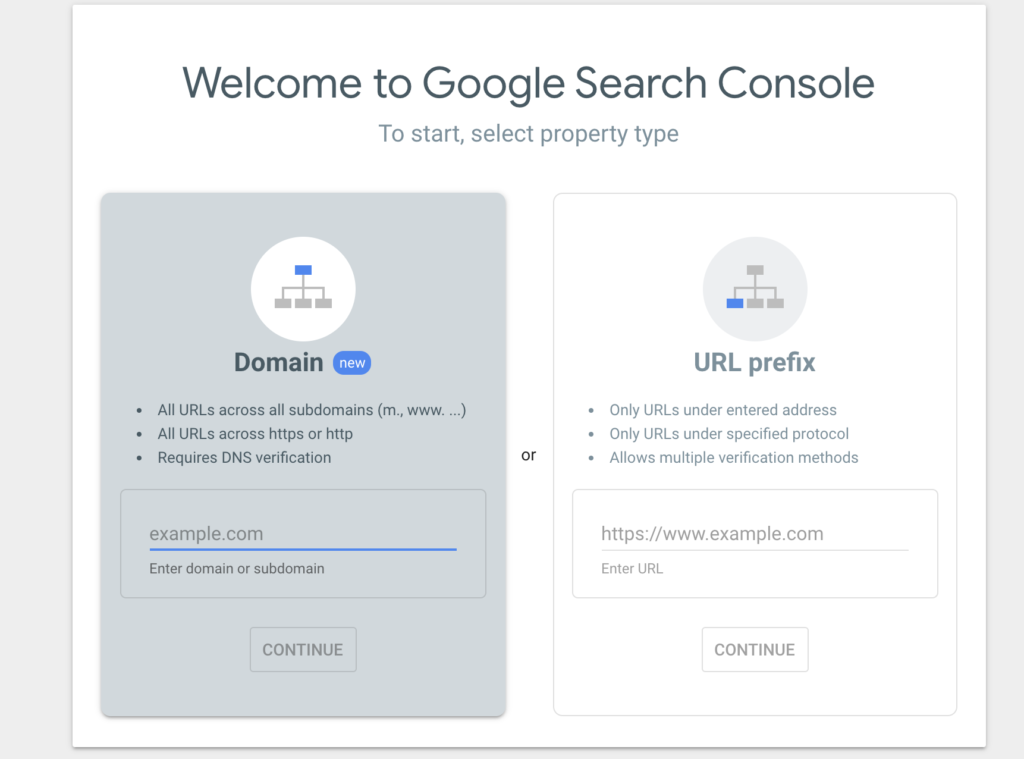
You will probably want to set up at least one Domain Property as this will give you the most comprehensive look at your website.
The other option, a URL Prefix Property, can be useful if you want to be able to view a section of your site separately from everything else. For example, perhaps you want to give a consultant access to only some of your data.
Once you decide what property type to set up, you’ll have to prove that you own your site. This is necessary to make sure that no one with bad intentions gains access to your site and your personal information.
You have 7 verification methods to choose from:
1. DNS record (required for Domain Property)
This method requires you to add the DNS record in your domain name provider.
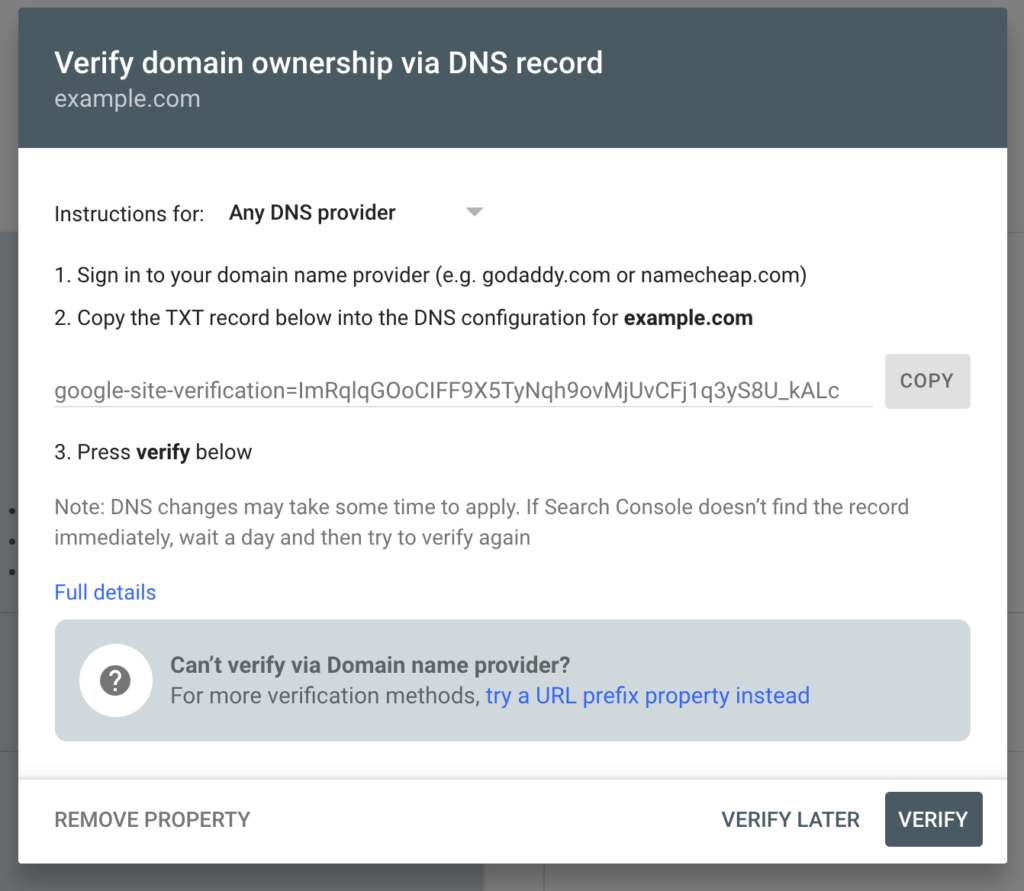
If you click the drop down menu where it says “Any DNS provider,” you will see specific providers listed. If your provider is there, selecting it will tell Google to walk you through the specific process for that provider. This usually involves logging into your account with the provider and then being prompted to click a verification button.
If your provider isn’t listed in the drop down, click Full details to be taken to the Search Console DNS help page. There you will find details on how to proceed for your specific provider.
If you go through the verification process and it doesn’t work, don’t be alarmed. Google shares that sometimes the process can be slow. Simply wait a few hours or a few days and then try again.
2. HTML file upload

With this method, you have to upload a file to the URL you’ve provided. Your verification should happen as soon as you click VERIFY. If it doesn’t click Full details to learn about potential errors.
3. HTML tag

This method requires you to upload a meta tag into the source code of the home page of your chosen URL. Your verification should happen as soon as you click VERIFY. If it doesn’t click Full details to learn about potential errors.

You must log into Google Analytics with the same account that you want to use for Search Console, and you must have “edit” permission in Analytics in order to use this method. Make sure that your tracking code is in the <head> section and not the <body> section of your page.
Your verification should happen as soon as you click VERIFY. If it doesn’t click Full details to learn about potential errors.
5. Google Tag Manager
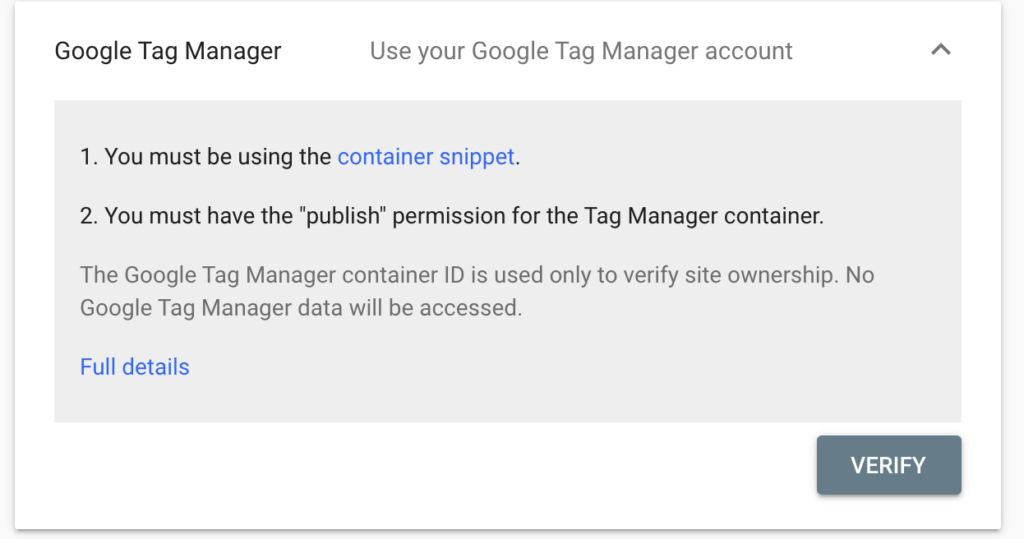
You must use the same account for Google Tag Manager and Google Search Console to verify using this method. Before beginning, make sure that your homepage has the <noscript> portion of the Tag Manager code immediately after the opening <body> tag or verification will fail. There must be nothing between the <body> tag and the Tag Manager code.
Your verification should happen as soon as you click VERIFY. If it doesn’t click Full details to learn about potential errors.
6. Google Sites
This verification method can only be used to add new URL prefix properties to your Search Console once you’ve already verified your Console using methods 1-5.
To verify using this method, you must be logged into the site using the same account you are using with Search Console.
- In Search Console, click “Add property” and add the URL of your Google site. Once you click “Continue,” your property should be automatically verified.
- You will not be automatically verified if you have a new site (created since 2017) without a custom domain URL, or a site created before 2017 with a custom domain URL. In this case, to verify your site, you will need to follow the Google Analytics method (#4) for new sites without a custom domain URL; and the HTML tag method (#5) for sites with a custom domain URL.
7. Blogger
This verification method can only be used to add new URL prefix properties to your Search Console once you’ve already verified your Console using methods 1-5.
New blogs that you create in Blogger should be automatically added and verified in your Search Console if you’ve used the same account for both. If the blogs aren’t being added, first double check that you’re using the same account. Then, log into Search Console, click “Add property,” and add the URL of your blog. Once you click “Continue,” your property should be automatically verified.
Older blogs will have to be verified and added using the HTML tag method (#5).
How many verification methods do I need to use?

It’s best to verify properties with a few different methods just in case a verification method fails for any reason. Google periodically checks all verification methods and if all of yours fail, you will lose access to your property in Search Console. Remember that you should not delete verification tags or files even after verification is complete.
For example, if you’ve only verified by uploading an HTML file, and an employee deletes the file for some reason, next time Google runs a check, your verifiability will fail and you will lose access to that property in Search Console if that was the only verification method you used. If you also verified using DNS and an HTML tag, and those methods are secure, you will be fine.
If you do lose access, it isn’t the end of the world. You can always re-verify, using the same steps listed above.
Along this same vein, we recommend that you make sure more than one employee has access to Search Console. This prevents you from having to re-verify if that one employee leaves.
If you want to see who has access to your properties, you can view that in Search Console. If anyone has access who shouldn’t – perhaps an old employee or an old consulting agency – their verification tokens can be removed.
What should I use Search Console for? What’s the most relevant feature for me?
At a high level, you want to use Search Console to optimize your site and your search results. There are many, many reports and features available to help you with this. Determining which ones are most relevant for you is going to depend on your role and interests. For example, are you building a site? Maintaining it? Optimizing it for SEO? Here are a few use cases:
- If building a site, Search Console alerts you to issues with markup, such as problems with structured data. Once an issue is resolved, it will disappear from your dashboard.
- If maintaining, the tool keeps you informed of any usability issues, such as site load problems, index issues, or security issues. This allows you to understand exactly how your site is operating and what needs to be done to improve the experience for all visitors and end users.
- As for optimizing, you have your pick of fun and interesting features that drill down into the effectiveness of your site. What pages and search queries are driving most of your traffic? What keywords are you ranking for? How many backlinks do you have?
At a basic level, you’ll want to log in and review the Console at least once a month. Google will email you if any unusual events occur – such as signs that your website was hacked, or if Google can’t crawl or index your site – but to truly optimize your site you’ll need to check out everything the Console offers and not only depend on those emails.
Performance Reports

Some of the most viewed reports are probably the different performance reports that the Console offers – one each for Google Search, Google News, and Google Discover. Each of these reports lets you see:
- Impressions: how many times users saw a link to your site; i.e. the number of times you appeared in search results
- Clicks: how many times someone clicked on the link
- Click-through rate (CTR): clicks divided by impressions
- Top search queries: the queries that are working best for your site; i.e. sending you the most traffic
- Devices: are more people accessing your site via computers or phones?
- Countries: where are your site visitors located? Does this make sense, or are you attracting a lot of attention from countries you can’t ship products to?
Search
In addition to the above mentioned metrics, this report will also give you your average position in search results.
When you open it, you can see how you perform in different categories: for example, which queries have the best CTR? Which pages have the best impressions? You can organize the results based on Web, Image or Video searches.
As you look around, be sure to use the Date filter at the top of the page to compare your performance from week to week, month to month, or year to year.
To really understand your results like a marketer, always ask “Why?”
- Why did impressions dip month over month? Did a competitor publish a really successful campaign? Did you publish fewer blog posts? Have you dropped in the rankings? If so, why?
- Or, perhaps – why did impressions climb year over year? Did you try something new? Is your domain authority growing?
If you don’t ask and answer “Why,” you won’t be able to reproduce or outperform results.
To help answer some “Why” questions, click on your Queries tab. This will show you impressions, clicks, and CTR for certain queries.
- Are there queries or keywords that you think you should be appearing for and aren’t? Time to work on the SEO of your site in areas like page content and metadata.
- Are there queries that have high impressions but low clicks? You might need to improve content so that the snippet shown in the result accurately answers searchers’ questions and/or entices them to click through.
- Are your pages performing well for mobile and desktop devices? You can check this by looking at the devices used column.
Discover
This report is only created if you reached a minimum number of Discover impressions in the last 16 months. If you did, you’ll see a report very similar to the Search report. You can organize metrics (clicks, impressions, and CTR) by:
- Page: the URL that served as the source of information shown to the user, not the URL the user lands on when they click the result
- Country: where the content was viewed and clicked
- Type of page: the page linked to by the result. It will either be an AMP article, a web story (optimized for visual not textual content), or a video.
- Date: the Pacific Time that the result was shown, not the user’s local time
News
This report is only created if you have a significant number of impressions on Google News. It shows data from news.google.com and the Google News app. It does not include the “News” tab in Google Search. That tab is covered in the Search report by filtering by News in the search type.
Security Issues
No one wants security problems on their site. They can cause headaches or catastrophes for your business, and pages/sites with suspected or known issues might not appear in search results, or might appear with a warning that deters clicks.
The Security report in Search Console will break issues down into three categories:
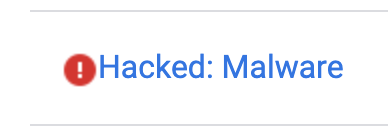
- Hacked content – any content that a malicious user placed on your site after taking advantage of a security vulnerability.
- Malware and unwanted software – software designed to harm devices and/or users.
- Social engineering – content that tricks users into doing something like sharing private information or downloading dangerous software.
An issue can be classified as either an error:
Or a warning:

If you have any issues, you can expand the category description to see a list of affected URLs. This might not be a complete list, but it will give you somewhere to start. Be aware that you will have to completely remove the security issue in order for it to leave your report. Google’s “Learn more” links will take you to pages with detailed steps on how to fix the issue.
Once you’ve fixed all your issues in your report from all pages, you can select Request Review to get an updated report. It can take several days or weeks for the review to be completed. Google will keep you informed of progress by email.
Manual Actions Report

In a world where almost everything is automated, it might surprise you that Google does still use human reviewers to check out sites. These reviewers exist as back-up to Google’s algorithms, and typically identify actions a site owner has taken to try and manipulate their way to the top of the search results. If you are guilty of any of these actions, your pages/sites will be ranked lower in the search results, or might be completely omitted.
It does not pay to try and game the system. Instead, make SEO a key tenant of your marketing and operations strategies. Optimize your site functionality, and create quality content that helps your target audience.
Manual actions include:
- Site abused with third-party spam
- User-generated spam
- Spammy free host
- Structured data issue
- Unnatural links to your site
- Unnatural links from your site
- Thin content with little or no added value
- Cloaking and/or sneaky redirects
- Pure spam
- Cloaked images
- Hidden text and/or keyword stuffing
- AMP content mismatch
- Sneaky mobile redirects
- News and Discover policy violations
If you have any of these issues, you can expand the manual action description to see more information, and then click “Learn more” to get a detailed report and see steps to resolve the problem.
Once you’ve resolved all issues listed in the report, you can request that Google review your site again. This will probably take several days or weeks. Google will keep you updated by email.
Index Coverage Report
This report tells you if Google has found all your site’s pages. It doesn’t need to be checked often; perhaps monthly to make sure nothing has changed, or after you’ve made significant changes. It can take awhile for all your pages to appear, so if you have a brand new site, or new pages, don’t worry if the pages aren’t indexed immediately. Give it a week and then check again.
It’s also important to note that Google will only index canonical pages. If you have a page that’s reachable by multiple URLs, or different pages with very similar content (such as a page that has a desktop and a mobile version), Google considers those as duplicate versions of the same page. It will pick one URL as the canonical version. That one will be crawled more often and indexed. The others will be crawled less frequently and will not be indexed. You can tell Google which URL is canonical. If you don’t, it will make a choice on its own, and it may not pick the page you want it to.
To pick a canonical page, you can:
- Add a <link> tag in the code for all duplicate pages that points to the canonical page
- Send a rel=canonical header in your page response
- Specify your canonical pages in a sitemap
- Use 301 redirects to tell Google that a redirected URL is a better version than a given URL. You would only want to do this when you don’t want the given URL to receive traffic.
When you review the report, Google will share:
- the URLs it has indexed,
- which ones it doesn’t think need to be included,
- which ones have issues that might be preventing them from being indexed,
- and which ones were not able to be indexed.
As always, you can read through the details of each item to see how to resolve any problems.
Your Beginner’s Guide

There you have it! If you have any questions about anything related to Search Console, SEO, or online marketing, let us know. SEO factors might fluctuate over time, but search engine optimization is always going to be a critical part of your brand’s success. Don’t be afraid to dive into it and take advantage of every tool that you can.